Wednesday, February 27, 2013

St. Patrick's Day blocks and board

I thought I would show the other side of the "My Sweethearts" blocks.  I really love that they work for two holidays/months!  This one is also on the How Does She Blog. 

I decided to take this concept and make it my "own"... I used a 9 inch by 24 inch board.  First I painted it white (probably not necessary), then mod podged 5 pieces of scrapbook paper on. 
Then I painted the "lucky" letters (from Hobby Lobby) and glued them on.  Next, I added vinyl and clips with ribbon, and a quick spritz of glitter spray.  Wahoo- a St. Patrick's holiday crafty board, nice and easy!

Monday, February 25, 2013

Multi Grain Bread

I spent a lot of time trying to make good loaves of bread, and over time became very frustrated with lack-luster results.  I kept thinking that the problem was with me, and that I just couldn't make bread for some reason.  Then my friend, Jen, came over and showed me how she makes bread using her Grandmother's recipes.  Both the white bread and wheat bread turned out great!  And then when I tried making them on my own, they still turned out!  I had been doing the process right, I just wasn't using the right recipes.  Since then, I still try new bread recipes from time to time, but generally stick with the tried and true ones for bread.

When Our Best Bites (I know, I know) posted a recipe for multi-grain bread, I thought that I would give it a try since I like so many of their recipes.  It was wonderful.  The flavor was very similar to Jen's recipe, but it had that little extra chewy-bite texture to it (that is sometimes desirable, sometimes not) that you get from grains that aren't finely ground.  I still use the other recipe the most because my kids like the fine textured wheat bread, but this is nice for when I am in the mood for chewy, grainy wheat bread! 

Our Best Bites has the recipe here. 

I am lucky enough to have a wheat grinder, so I grind my own wheat.  Because I don't enjoy cleaning out the grinder (even though it is really easy), I always make 2-3 times more whole wheat flour than I need.  Then I just put it in plastic zippered freezer bags and store it in the freezer.  When I'm ready to make bread again, I just pull out the bag to let it come to room temperature, then make the bread.  The reason for keeping it in the freezer is because freshly ground wheat can go rancid really quickly.  It will last a couple weeks in the cupboard, but I use the freezer because I never know if something will come up where I am too busy to make the bread.  And, yes, that was learned by experience and a couple batches of whole wheat flour that went rancid.  Bleh. 

I tried the recipe using Bob's Red Mill 8 grain and then with the 10 grain.  I liked the 8 grain better.  The 10 grain was definitely just more cornmeal- and maybe millet?- so it was more gritty.  The 8 grain had more of the chewy whole wheat berry texture that I liked. 

My favorite way to eat the bread?  Toasted, lightly buttered, with sliced avocados and a little salt and pepper on top.  Heavenly!

Friday, February 22, 2013

Argyle Plaid Baby Quilt

Isn't Greg so nice to hold my quilts for me?  Because that's just what any 11 year old boy wants to do!  :)

Ok. So when you make something, do you think, "This is my favorite__________ yet!" ???? Well, when I finished with this quilt, that is just what I thought!  My favorite quilt top yet!  I started with all diamonds, then sewed strips of contrasting fabric down the centers, every other row.  I feel like this picture doesn't quite do it justice.  Here you mainly see the lights and darks of the fabrics, and the trend going in rows.  In person, that isn't quite as noticeable--- each diamond stands out better.  I love it!  I am so excited and want to try it out with lots of different fabrics.........good thing I know where to find more fabric.  In the craft closet!  I bet you thought I meant the fabric store, and I was giving up my resolution to "use the stash" already! But, no. I am still going strong.  :)

All in all, the quilt top wasn't too bad.  It took a little adjusting to get used to sewing with all the angles.  Most of the places where all 4 points meet are spot on, but some are a little off.  I had to just let go and not worry about it too much.  It took me all day just to do the purple top, then another day to sew on the yellow strips, quilt it, and bind it.  Which is kind of a lot considering that it is just a baby blanket!  But, I really think that now that I've made one, the next one will go a lot faster.  At least I hope it will. I definitely think I will try for a random placement next time, to avoid having the eye distracted by an unintended background pattern. 

Monday, February 18, 2013

Chocolate Orange Cookies

When I think of chocolate and orange together, I think of those chocolate covered orange jelly sticks.  The slight give of the chocolate as the outer shell is broken.  The chewy, tangy orange center that mixes with the chocolate as it melts.  Heaven.  While growing up, my Grandma gave us a box of those orange jelly sticks pretty much every Christmas.  I loved them.  It made me smile to see the tell-tale (or is it tale-tell?) wrapped package sticking out of the top of the stockings that she prepared.  We knew we would have that treat along with all sorts of miscellaneous tiny packages wrapped tight in paper and tape so it was hard to open- things like a roll of quarters, a package of gum, little knick-knacks, etc.  Why am I talking about Christmas?  I really don't know.  Just got off on a tangent of memories associated with those chocolate orange sticks. 

So, when I saw these cookies on the Six Sisters' Stuff Blog, I knew I had to try them.  They were really good.  Nice and easy to make, they reminded me of orange sticks with every bite.  When I first saw the recipe, I noticed that the orange frosting didn't include orange zest.  I usually prefer to use zest in anything orange, lemon, or lime flavored because the zest just makes it so much better.  And less.......fake....artificial tasting for lack of a better explanation.  But.....I didn't have any oranges, and I didn't want to go to the store just to buy an orange to use for its zest.  So, I tried the frosting just the way the recipe said... and it was good!  I did use the good Watkins extract, so that might have helped, but I ended up being ok with orange frosting without orange zest!   I also chose to not dip mine as deep into the chocolate ganache.  Mainly just because I had piped the frosting on using a star tip--- and they looked rather messy when I dipped them in deeper.  I thought that they might be time consuming because of baking, frosting, and dipping, but I was surprised at how fast they went.  If you like the flavor combination of chocolate and orange, try out the Six Sisters' recipe.  You can find it here.  I hope you like it, too! 


Friday, February 15, 2013

Ombre Chevron Quilt, HST Method

After making the chevron quilt using the 2 strip method, I thought I would try one using HSTs (half square triangles) to compare the two methods.  I started with 5" squares.  In the quilt using the 2 strips, each strip was 6".  So these Chevrons are smaller than the one I made using the 2 strip method, which makes it a little harder to accurately compare. 
 
What I found comparing the two methods:
 
#1. I don't think the 2 strip method actually saves fabric like I thought it would.  The reason for that is that you have to cut off the jagged edges to get the rectangular quilt, and all of that fabric is wasted.  The half square triangle method very efficiently uses up the fabric, both with cutting the fabric and with sewing the fabric.  So, of the two methods, the HST seems to waste less fabric, in my opinion. 
 
#2.  I did feel that the 2 strip method is faster.  I sewed each 6" by WOF (width of fabric) into strips (using one print and one white strip), sewed them, and then cut them in to 11 1/2 inch squares.  Sewing, ironing, and cutting was very fast and easy.  Even if I had used bigger squares for my HST, the equivalent of the 6" strips, I still think the 2 strip method would be faster.  However, if I wanted to make huge Chevrons, then I think the HST would be better. It took me just a couple/few hours to sew the 2 strip top.  It took me 2 days of sewing to finish the HST top.  Quite a difference. 
 
#3.  I think the 2 strip method overall was easier.  You are only dealing with on grain or cross grain fabric.  With the HSTs, you have bias edges that stretch, so the top can be a little wavy if you are not careful.  There is also more sewing/piecing with the HSTs.  However, when it comes to laying the fabric out, when  the blocks are done and you are ready to assemble the quilt, the HST squares are easier to lay out.  You also have the bonus of not having to cut off the edges to make the rectangular quilt.  So, of these, I guess it would matter which problems would bug you most!

Now that I am starting to feel comfortable with stippling to machine quilt, I thought I would try to quilt shadow- the Chevrons.  After sewing two, and taking a loooong time to do it, I gave up--- quilted the other end the same way so it would match, and then just did the random stippling for the rest.  Much faster!  Maybe when I'm not pressed for time I can learn how to do the other kinds of quilting stitches! 

I do like how the shadow quilting looks, though!

When trying to lay it out, I kept trying to balance the colors.  It just wasn't working.  Mainly because of the dark grey.  No matter where I put it, it stood out too much.  Then I thought about how ombre is popular right now.  So, I tried an ombre layout.  I liked it a lot more. 
 That's what I stuck with--- an ombre Chevron quilt! OOOOooooh!  That gives me an idea.... I'm going to have to look to see if I have enough fabrics in one color family to do a true ombre Chevron quilt!  :) 

Thursday, February 14, 2013

Valentines Table Runner

So, you remember my post from the day when I was trying to sew, but my mind wasn't on sewing?  Well, I finally finished that project!  I debated and debated, and actually wanted to make this into a blanket, but I made the squares so tiny, I didn't have enough time to make it into a blanket.  Actually, I didn't have enough of some of the fabrics, either.  This is the finished table runner!  Yeah--- most projects I am happy to work on, and I enjoy the process.  For whatever bizarre reason, this is one I am glad to put to rest and move on! And it wasn't that hard!   
 Yes, I'm sure you remember my troubles getting the Chevrons right.  You'll be glad to know that after that day, I didn't make very many mistakes, and things went back to normal. 
It took me a long time to find the right placement of the chevron rows.  I had a hard time getting it to feel balanced.  So I arranged and rearranged until it looked right to me.
Here I'm just trying out a few items on top of the runner...
  And the gingham back.  Just in time to have it out for a day, then it will be put away until next year! Happy Valentine's Day!

Wednesday, February 13, 2013

Valentines Flamingos

I have two daughters.  Both are incredible, amazing, and lovely.  One is very into school, crafts, cooking, and all busy things like that (a bit like me).  The other is not so interested in those things--- she has her own interests- like boys, hair, clothes, styles, etc.  It has been amusing to see our two daughters be so different, and we are very grateful they get along so well.  I showed our youngest (the one into crafts) some cute homemade Valentines (that I saw on Pinterest) that were flamingos--- and she went crazy over them.  The next thing I knew, she was asking me every day, several times a day when I was going to buy the pink feathers and chenille stems/ pipe cleaners so she could make them.  I kept putting her off because I would have to go to the craft store to get them, and the craft stores are far enough away that I rarely go.  One day while I was at Walmart, I noticed that they had a package of multi-colored "fuzzy sticks" aka pipe cleaners/chenille stems.  And a small bag of white feathers.  Being completely lazy, I thought--- those will work, and the multi- colors will probably be cute. 
 
I brought them home, and when Kelsey got home from school, she immediately went to work coloring the white feathers with colored sharpies so the feathers would match!  So funny.  She worked and worked until she had colored enough feathers.  She even (by memory) made up a class list, and put a check in the right color by each child's name so she would know how many to make of each one.  (I confess she gets her list-making from me, too.)  She twisted the legs and the heads using the chenille stems.  Then she had to wait on Mommy to cut out the hearts. 
 
The poor girl waited and waited and waited.  When she started almost freaking out because it was getting really close to Valentine's Day (at that point it was still two weeks away!  Luckily, unlike me, she does not procrastinate!), then I finally got around to cutting out the heart bodies.  I happened to have paper in the right colors, so K-bug was happy to finally get to put them together.  I was worried about her burning herself with the glue gun, but she told me that her job was to glue them, my job was to hold them together until the glue set.  And that's how it went.  When Kelsey went to bed, they were still headless, but I got on that right away so we could finally put the flamingos away!  Kelsey happily took them into her classroom over a week early, assuring me that her teacher wouldn't mind. 
 
Now, don't you think Kelsey did a good job on her Valentine's Flamingos? I love the google/wiggle eyes.  She had a blast!

Monday, February 11, 2013

Valentine's Scones

On a cold day we got the call at 5:15 am. School had been canceled for the day. The kids happily slept in.  (I love the irony pointed out by a friend- that we are woken up at 5 in the morning to be told we  can sleep in!)  For the enjoyment of our Utah friends, this was how much snow we had.  :)  Although, to be fair, I believe the issue was icy roads.  And while that is something Utah drivers deal with all the time in the winter, as I understand it, the school bus drivers belong to a Union, and that Union is the one that kind of calls the shots.  They don't want the liability in case of a bus accident.  So, when it snows or is icy, school is canceled.  The kids love it.... until they have to do the make up days!
With Valentine's Day coming up, I thought it would be the perfect time to make scones. Not just any scone--- but heart shaped scones!  I tried the scone recipe from the "Favorites" Cookbook that you can buy through the Children's Miracle Network in SLC.  But, honestly, I prefer scones made from my regular roll recipe.  So, if you have a roll recipe that you love, use that! 
All cut out and ready to be cooked.  They were little- only about 1 1/2 - 2 inches, slightly bigger than donut holes.  Cute! 
 
Frying up in the pan. 

Heart scones on a heart plate.  Kelsey goes bananas over this heart plate.  It is as if it's a treat in and of itself!  We have also found that scones are much less messy if you dip them in the honey.....
 
Yum! 


Friday, February 8, 2013

Birdie Quilt

I bet you thought you were going to finally see the Valentine's sewing project...... but, no!  Not yet! :)
In the middle of a cold spell, and after a hard day, I was in the mood for something bright and cheerful.  I found this cute and bright fabric in my "stash" with teal, coral, yellow, and green in it..... I wish I knew what line it is.  I had a jelly roll of this fabric, but had already made it into the Thimble Blossoms "June Bug" top.  So, the biggest problem was that there wasn't a whole lot of the fabric left.  Hmmmm... how to make it work.....

I have had my eye on a few "orange peel" or "pumpkin seed" quilts that I've seen on quilting blogs.... they are so cute!  I hoped that it might be a good way to make a fun quilt without losing a lot of fabric to seam allowances.  But, I wanted to go one step further.... I've also had my eye on a few quilts with cute birds in them.  Cute, crafty, long legged birds.  So I thought that if I made an "orange peel" variation, then I could leave the middle sections open to put a little birdie in.  I found a bird that worked in Silhouette's studio, but I had to alter the beak because an open beak just wouldn't work as well since I was sewing it. 
I have to confess that I like the long legs!  And the tiny bead eyes.  And how crinkled quilts get after being washed.  I used Heat and Bond lite for the bird bodies and the "orange peels/pumpkin seeds".  I was really worried that the Heat and Bond lite would be too stiff- and not crinkle like the rest of the quilt and possibly look funny.  To my delight, it looked just fine, even after washing.  Then I did a somewhat close zigzag over the edges, although not close enough to be considered a satin stitch.  I used black thread in my machine to do the legs.  I looked and looked in my "stash" for tiny buttons for the eyes.  And was somewhat surprised to realize that I didn't have any!  :)  Yes, Jen, I know you are as shocked as I was! :)  I spent about a week debating if I should just go buy some tiny buttons.  Then I decided that no, I was going to do everything I could to stick to my "use the stash" policy (even though the buttons would have only been about $1!) So, I used my machine to do satin stitch eyes.  But after I had done them ALL, I decided that they were just way too big.  So I unpicked them.  I thought of doing embroidery French knots, but I knew that black embroidery floss tends to bleed.  I thought that after washing, the little birdies might look like they had mascara tears.  Which would totally take away from the cheerful point of the birdies!    
Then I suddenly remembered that while I did not have tiny buttons, I did have super tiny "seed" beads- that were black, and would work for the eyes- and I could use regular sewing machine thread that wouldn't bleed.....ahhh- problem solved!  Tiny, dimensional eyes for the birdies!  (Spending the buck would have been far less time consuming! :)  Lol.)

Wednesday, February 6, 2013

Valentine's Blocks

A few years ago, I first saw this cute craft on How Does She.  A few friends got together and made them.  It was fun to see how cute they turned out, and how they all look different because of the different paper choices.  You can find the tutorial here. 

I chose to just use a sheer ribbon to hold the picture- I didn't want to take the time or expense to find the clips.  Lazy, I know.  One of my favorite parts of this craft..... If you flip the blocks over, the other side is for St. Patrick's Day-- the next holiday.  Nice and convenient, and it saves storage space by not storing two sets!  Very clever of How Does She!

Tuesday, February 5, 2013

Valentine's English Muffins

 My kids (and husband) love to have Egg McMuffin (minus the Mc) sandwiches in the morning for breakfast.  Pretty much every morning we are breaking out the English Muffins or the bagels to make an egg, ham, and cheese sandwich. 
A couple years ago I printed off a recipe for heart shaped English Muffins from Family Fun's website.  When we were out of English Muffins, I thought I would try the cute little Valentine heart ones because I had never made English Muffins before, and I was curious.  They were really easy, but with the rising time, were not done in time for breakfast!  :)  You can find the recipe here.  It was fun, and cute--- but to be honest, we prefer the store bought muffins.  Most things taste better homemade, but while these were fine, it is a recipe I would only make again for the cute heart factor, not for the taste. 
I couldn't find my regular heart cookie cutter and had to use the scalloped one.  I wondered how they would turn out.... but it was funny to see the scallops almost disappear as the dough rose and cooked.  Right after putting them on the corn meal sprinkled skillet, they started to puff up!   

Browned on one side, they are starting to look like English Muffins!
And here is the other side- they definitely look like heart shaped English Muffins.  My kids thought they were cute. 
And the taste test..... well--- they were more just heart shaped bread.  They didn't really have the flavor or texture of English muffins.  Where most English muffins are light and have big air pockets in the bread, these were dense, like regular bread.  Which is still totally fine.....just not an English muffin like we are used to!
A couple of tips for all of you out there.....since my kids (and hubby) like these pretty much every day, I had to come up with something easier and better than cooking the eggs in a pan every day.  I found out that if you use a bowl- these Anchor (2 cup sized) glass bowls work perfectly, they make the egg perfectly round and perfectly the size of an English muffin.  Just spray the bowl really well with cooking spray, and crack one egg into it.  Use a fork to scramble the egg, and put it in the microwave on high for 1 minute.  If I don't scramble it well enough, it will sometimes pop a little while cooking, but it's not a big deal.  I usually stick the English muffin in the toaster, then work on the egg, and by the time the toast is out and buttered, the egg is done and ready to turn over onto the toast.  Topping with a piece of cheese and a couple slices of ham, you are done in about 2-3 minutes with a nice, easy, warm breakfast!  Easy Peasy!
 
Another tip for all of you..... we like the Thomas brand of English muffins.  But, we had the problem of them drying out before we finished the box, even when trying to keep the plastic bag closed.  The solution to that problem was easy, too. 
When I buy them at the store (usually Sam's Club or Costco), I take them home and slice them so I don't have to wash the bread knife every day.  So I slice them all at once. 
Then I put the sliced muffins back in the bag, and toss the box in the recycle bin.  The muffins can hang out with your bread on the counter, or after slicing and bagging them, I will put them in the freezer, and just pull out a few days' worth at a time.  No more stale muffins, and no wasted moldy muffins= awesome.
 

Friday, February 1, 2013

Sewing while distracted

So, I had the idea that today I would post a lovely little quick sewing project.... so last Tuesday, I got started, because I didn't want to leave it to the last minute..... and guess what? My quick little sewing project.....is not done. Not even close. Does that happen to you? Even this morning I totally thought I had a shot of getting something done. But, no. I showered, took my daughter to school, went to the post office and then to WaWa (a gas station) as it was a diet Coke kind of day, got home, checked on my son's school work, and got to work sewing. I was making nice progress.
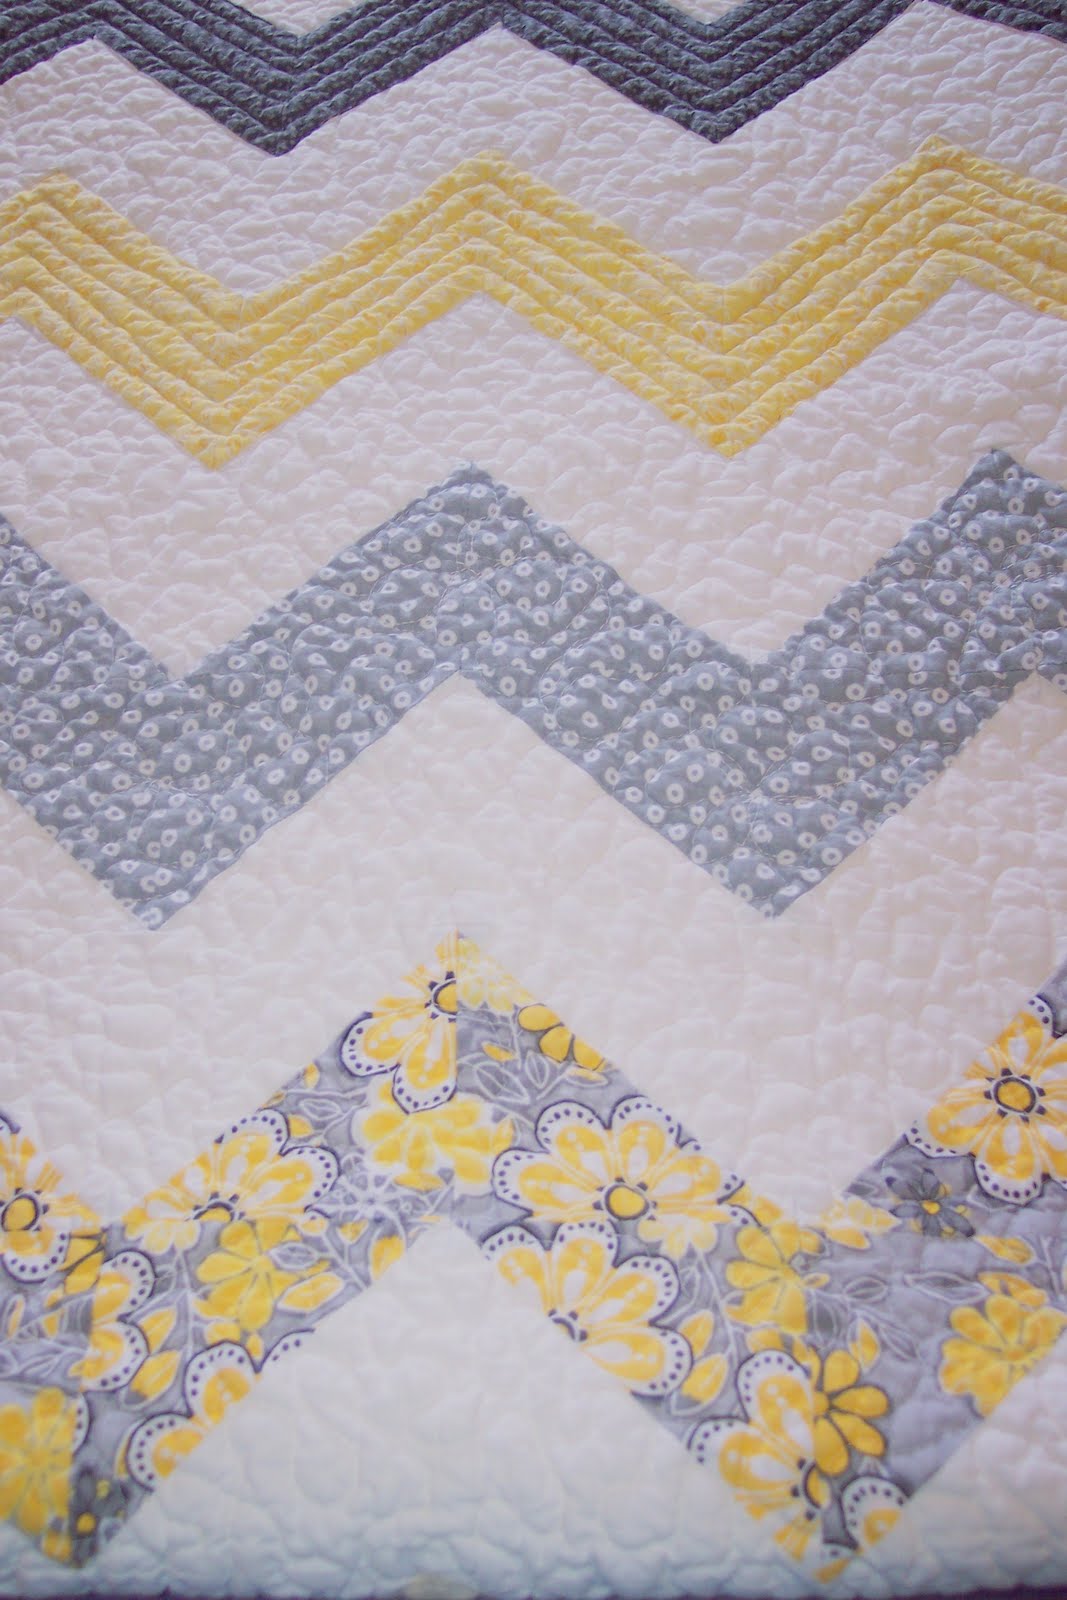
See?  Isn't that lovely progress on this Valentine's..... sewing item?  I still can't decide if it's going to be a table topper, a table runner, a lap quilt, a pillow........you see where I'm going here.  I keep thinking that if I could just sew some more half square triangles to use up my Valentine's fabric, then I will figure out exactly how much there is and what I can make with it.  But I made the mistake to use 2 1/2 inch squares for the full square- so each triangle is half that, then sewn.... it is all so very tiny and stretchy and taking lots and lots of time.  I've worked on it for a few hours every day since Tuesday, so I thought today would be the day to actually get something done. 

Then I allowed myself to be distracted.  It started with the computer........knowing Our Best Bites posts today, I had to just hurry to check their blog..... then became distracted by memories of the first time I had an avocado roll with some friends (and one mentioned that the rice paper skin was a little too alien-like for her) which really made me laugh because I can see exactly what she's talking about.... but I like it anyway because I'm weird like that....

Then I noticed that Kate mentioned Tim Riggins and Tammy Taylor.  Now, Kate (I say Kate like I know her, when I don't- at all.  But I don't remember her last name, so it's just Kate!) is to blame (or rather to thank) for introducing me to Friday Night Lights.  When I saw her post her Tim Riggins Brownies, I knew I'd have to watch the show on Netflix to see just what would inspire a food blogger to name a yummy brownie after a TV character.  Hello.  The next few weeks were spent obsessively watching Friday Night Lights.  I loved the characters.  Now--- just a word of warning.  This is not clean show.  If you hesitate to watch a PG 13 movie, you do not want to watch this show, as it is most definitely a PG-13 show.  I will fully confess to averting my eyes during some scenes, to fast forwarding during some, and to being offended by some of the things in it.... BUT, other than that, it is so awesome! I love Tammy Taylor.  I want to be Tammy Taylor.  And it's not because of Kyle Chandler (Coach Taylor).  Or even because she gets to associate with Tim Riggins.  It's because she's a super classy lady.  I love her personality and how she handles things.  I love her accent.  I love her expressions.  About right now you are wondering if I realize that she's a fictional character.  I know she is.  But I love her all the same.  I even confess to having a certain fondness for Texas, even though I've only spent a couple days there- and I don't know a whole lot about it.  But I get all sentimental feeling like I have summer, football, and Texas memories whenever I hear the theme music for the show.  Love it! 

You might also be thinking that I need to get a life.  Well.... I probably do.  But the truth is that I rather enjoy being a little hermit-like homebody.  And see how easily I get distracted? 

Then I got a phone call and I noticed how dirty the kitchen floor was.  So I swept and mopped the floor during the call.  Then I got another call and became completely distracted.  I had lunch, tried to sew, and then emailed friends about FNL and Our Best Bites' Avocado Rolls.  Still distracted, I tried to sew again.  Then I realized the time, and knew I needed to buckle down and get something finished so I could post a sewing project, so I started ironing all those tiny little sewn squares and realized that this was the progress I had made this afternoon:
Completely distracted!  Chevrons all skewumpous (my word made up from the word skewed), two right Chevrons sewn together, leaving two lonely left ones....TWICE! Technically the second time was two left Chevrons sewn together leaving two lonely right ones, but I know you don't really care about that. Even upside down Chevrons.....you get the picture.  I decided to call it a day, and so all you get is a sneak peak into what may show up next week.  But--- you don't know if it will be a pillow, or a blanket, or a runner, or......... (and neither do I).